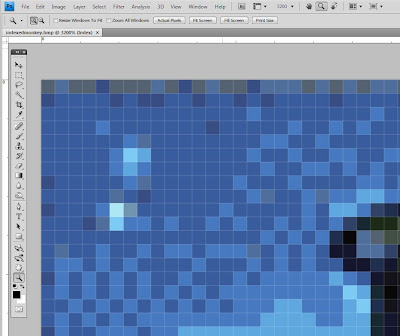
The key to this is simply zooming in. Use the magnifying tool to zoom in to 3200% and this is what you will see!

It can't really get any clearer than that. Well of course it can. Now that you have a clear pattern to work with, you may want to sort out what colours you'll be using. When I said 32 colours I probably meant 29. Photoshop always adds pure white, pure black, and transparent in their colour table. None of these colours will typically be found in a picture. Still, there are a lot of shades of blue in this picture, and to try and organize them, I use the Color Table.
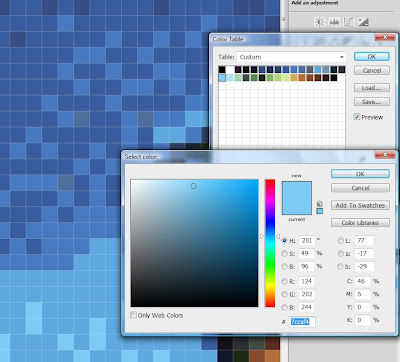
Go to Image > Mode > Color Table...
You will now see a colour palette with the 32 (29) colours in your picture.

This is a great help when picking colours. If you're very picky about the colours, you can fill entire blank documents with each colour and match them against your threads. Since I didn't have any threads at all when I started this, I had great help from the DMC yarn website and their colour cards. I then made a list which looked something like:
1. Black (not in picture)
2. White (not in picture)
3. Dark purple (154)
4. Blackish blue (939)
...
etc - the numbers 1-32 describing the place in the colour table and the following numbers being the DMC thread colour number.
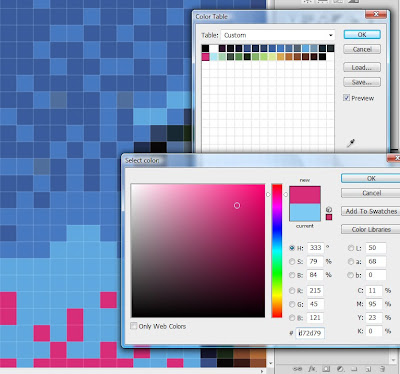
The final step is starting to stitch. Once again, I found that the shades of blue were a bit confusing to me, especially when you're counting stitches. And once again, the colour table is a great help. It lets you change one colour at a time, so just pick the colour thread that you want to start with, go to the colour table, highlight the chosen colour and then use the palette to specify a new colour - something that shows up against the other blues.

This makes it ever so easy to see where the colour should go and where it shouldn't!
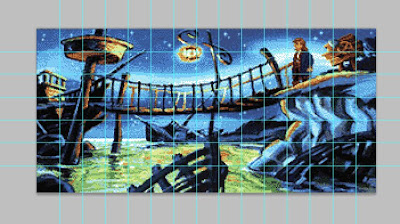
Finally, I wouldn't dream of doing this one full row at a time. Instead, I used the photoshop ruler guides (go to View, tick Rulers and you can pull out guides from the top and side rulers) to divide my pattern into managable squares. I then stitch one square at a time:

Of course, you could use this technique to make a pattern out of any picture. Just pick your size, and your number of colours and you're off!
To much technique for me, and thats how I know I'll never make a wonderful stitch canvas like yours- I admire you going through all this though:)
ReplyDelete